Thursday, January 28, 2010

whoa now.

A new day means new designs... ALL handpainted.. of course but i did copy them out of the nail mag. pink and glitter striped, freehand black swirl shit (that i only semi copied from the mag), maroon nail with a purple heart, add some white dots and voila! The next nail is a heart wreath of roses. inside written love. it was supposed to be straight, but whatever. i can't make letters that small. If someone asks to do it i shall write J+S instead of Love inside. at least that would fit. the roses all have 3 colors and leaves. The next is black and silver argyle. The next is two different colored pink polishes blended to a fade, then with black designs ontop.Added some iridescent glitter and PACHOO (bless you) you have an awesome nail. The last one is a pearl colored nail with 2 different shades of green and black for the clovers. all hand painted with a detail brush. Added a top glitter coat and you have an instant St. Patty's nail.
Oh my, my, my! Nancy's toes are so dry- they need oil something fierce! but either way i painted her toes Salsa Red by China Glaze. then used Love My Nails Crystal to make the diamond design. it looks SAUCY!


And this... this is my toe. Classic french (yawn) with Love My Nails hearts and crystals. You should be able to find this at your local walmart in the Love My ____ section of the beauty department for a dollar they're flat and look like regular rhinestones. These won't pop off like the regular ones because they're flat. I might have said this before. Oh well. yea... so i have some blinging toes as well.


Last but not lease, this is my friend Eugene. He sits on my lamp and keeps me company during the day. Thanks to the Tampa Aquarium he is now a permanent resident at Define Nails here in Brandon Florida.

Thursday, January 21, 2010

like whoa times 10.

New post. New Shop. New nails... enjoy.
Mandy's toes... she wanted rainbow...
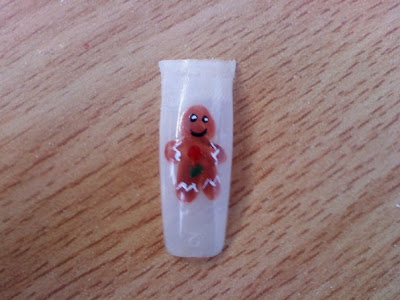
one of my Christmas nails- this one is obviously Christmas lights... yea...

long ass nails... with lots of snowflakes... btw those snowflakes are totally popular AND time consuming


NOT MY GUMDROP BUTTONS!!!!


howdy frosty.


my newest nails... Valentines day series. done on 1/20.2010. yea... pretty cool.. copied them right out of the nail mag. the last one on the right is 3d acrylic which i did on my own. fish with plants and a seashell. gold sand...
FTW! omg i'm so uber nerd now. I'm down with the net lingo... rawr.
I shall be doing avatar blue french tips later! thats right folks... AVATAR blue. So everytime you see them.. you'll always remember Avadong. yes.. i said it. AVA-DONG.

Sunday, October 25, 2009

Quickie

Haven't posted in awhile, i've been super busy with life. I have been doing great at school, doing full sets are no problem anymore, i'm learning "pink and white", but i'm twisting the technique with cracked ice,colored acrylic, and such.


Here are a few of my October designs. October is breast cancer awareness month, so in honor i have done a TON of toes with ribbons. I didn't take any pictures, but they're all pretty much just pink toes, with pink ribbons on them with some glitter to jazz it up. below are my pumpkin toes and Halloween designs.


Black nail polish i picked up at Sally's. Pro something is the brand, then i painted the pumpkins with acrylic paint, topped it with some nail glitter and topped it with OUT THE DOOR top coat. which seems to be my favorite top coat so far. super shiny and dries really quickly!

french with pumpkin-acrylic paint, candycorn-acrylic paint, black with pumpkin-acrylic paint and glitter, spider and web-acrylic paint with glitter, bat-acrylic paint then outlined with glitter polish stick, frankestein is also acrylic paint. This picture doesn't show very well the TINIEST of details in the ribbons, or the halloween designs. the ribbons have 2-3 different pinks.


Below are my "pink and whites". I got bored with regular pink and white and decided to play around with it... i first designed the heart out of dark pink acrylic. then carefully used white to edge it and make the tip. cut, and voila! heart in tip!


i bought a cheap set of acrylic colors and have been playing around with the "pink and white" technique. This picture doesn't show how bright the neon yellow really was, and i originally thought i was using magenta, but after adding nail monomer, it turned dark blood red-bummer.


For these i used blue and purple acrylic, then topped it with blue and purple cracked mylar ice. regular pink and white style, but jazzed up. this was my first attempt, and i didn't file or drill for this picture... so yea.... don't hate on the shape!


I've also been playing with designs, copied a few from my friend(who copied them from somewhere online), and came up with a ton of my own. I am not posting pictures of ALL of the designs today.


These are some designs my friend copied from the internet, and i then copied her. the last one is my own creation using glitter. I didn't add the clear acrylic over it as i would've liked to. Sadly i was all out of clear. the other designs are super cute. The one on far left is asian inspired. i used the nail art striping paints(i can't figure out the right name for those things), the rose buds were done with nail art paint thingys as well, the purple nail design was used with half acrylic paint and half nail art sticks(again, still struggling with the technical term for those things) a dotter and some glitter. The black and white nail was created using acrylic paint, and a touch of glittter. For the red nail i used polish and nail art stripers.pretty cool designs right?


tiny flower using a dotter and a tooth pick to make the lines in the petals, and nail art stick thingys for lines and "leaves", then dotter again for black mini dots and center of flower. looks pretty cool on a longer nail bed.
my zebra toes, inspired by my friend Dani. We used bright medium pink for top half, white for bottom half, and used a black nail art pin stripe thingy for the zebra lines. glitter line to seperate the two and BAM! you've got really awesome toes! I got ALOT of compliments on these.

the last picture is pretty dark, but i used LA colors art stick polish thingys for all the designs.


I have been using an art box with lots of different compartments to hold all my nail polish accessories, but its overflowing, and the snap locks are coming off! I have been on the search for a Train Case. I seem to take a liking to the OPI cases since they have 32 slots for polishes. Only problem is that they're super expensive. I found one at walmart, but it wasn't big enough, and i haven't looked at Sally's, Sephora has a few, but they're overpriced in my opinion. Ebay seems to be a hotspot(as usual), but i am afraid of buying one and it not being big enough for all my stuff.
I have 51 hours left of school, and then i graduate. In florida you only need 240 hours to get your Nail Technician Certificate. So i'm ALMOST there!!!
That's it for now, life is calling me.


Sunday, September 13, 2009

First nail update

Hello everyone I just wanted to post a picture of my nails! My friend came over and gave me a full set. She used aquamarine northern lights acrylic for the tips and light pink tammy taylor for the pink. She did the pink and white backwards. She did the pink first, then applied the aquamarine tip. Pretty neat. Didn't have to use a cutter of any sort. Then she used acrylic paint to make the colorful hookerific design.

I have a few pictures of my own nail art as well.


My friend Alice showed me how to do these butterflies and Dahlia showed me the swirl/streaks?


The octopus and the xoxo's are acrylic paint and a very tiny detail brush, and the black and pink dots and lady bugs were used with polish. I used a dotter tool to make the black and pink tip design, and nail art polishes to make the lady bugs.


yes its a taco. a vegetarian taco of course!
These are all made with acrylic paint and a tiny detail brush. You can buy the brush at any craft store or buy a detail brush at Sally's. I also used a glitter nail art polish to detail the designs because i didn't have glitter dust to blow over the acrylic paint as it was drying.


This was my very first full set i did these about 2 weeks ago! thanks to my sister! I'm still in school and i'm quite proud of my full set! i use a number 18 brush and i've practiced my acrylic a MILLION times before even attempting a full set. my teacher wanted me to do fill ins and full sets weeks ago but i didn't have the confidence yet...

She kept it simple with black tips, a silver glitter line, and some lines and dots on the ring fingers. Wish she would have let me go crazy on all 10 fingers, but oh well, maybe next time :)
Let me just say that i've been using the Art Deco Nail Art brush/pens and they're difficult to design with. I'm an artist naturally, and using polish is a really hard medium to use. I prefer Acrylic paint and i had some tiny pots already. My friend Tiffany came over today (she has been doing nails for over a year now) and she told me her salon uses only acrylic paint for designs, and let me just tell you how extremely happy that made me :) I am heading to Michael's (our local craft store) to stock up on Apple Barrel Craft Paint. Scrap Booking Glitter Dust, Sand Art Bottles to put the Glitter Dust in, AND.... 1 or 2 detail brushes.
I am a VERY happy girl today!

Friday, August 28, 2009

Fantastisch!

So i guess this is where i begin my blogging, eh? I'll probably update with pictures of my nail art, or how i am doing in nail school, or what crazy things my children did or said. Nothing too crazy, i assure you. Anyone with a heart condition is encouraged to go along for the ride, and please never wear orthopedic shoes. that is all, thank you.